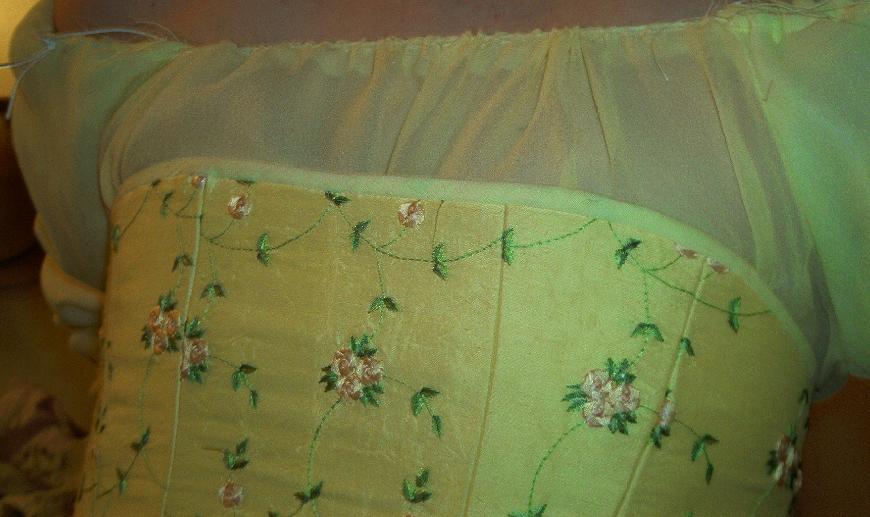
The first picture of the chemise. Also known as blouse, underdress, etc. I naturally tend to use the more historic term :) This picture was taken while I was holding the corset on with one hand. I had my digital camera in my other hand. I was standing in front of a mirror and had the viewer was turned on so I could see when I had a "good" picture. The edges aren't finished, etc. I promise to get a good picture up later, once it's done. I'll even have someone else take it...
The chemise has been finished! I just need to sew the ribbons on the arms. Pictures to come soon!
This is my second version of the chemise. My first version is in a bag in my closet. Let's say a good idea at midnight that involves scissors probably isn't a good idea. The sleeves were the only part I was able to salvage. I used a pattern that didn't have a gathered front, thinking a smooth front would look fine. I was very wrong. I learned two important things during this. I didn't want the chemise lined, it would be much prettier with just the sheer chiffon over the corset. The sleeves are still lined. Second, I couldn't believe how strong the chiffon was. Much stronger seeming fabrics didn't take the beating I gave the poor thing with the seam ripper half so well. Good to know.
I ended up using a "Renaissance" pattern, Simplicity 8715. The chemise in the pattern was almost exactly what I wanted though. It just had an elastic neck. To eliminate this I used 1/16" piping in the neckline. I sewed it in with my zipper foot and pulled it to fit me. I originally kept the sleeves elasticized for freedom of movement. A cord all around seemed like it would be a little restrictive. I ended up not liking the way it looked though, took the elastic out and pleated the sleeves. There's a close up picture of this on the details page.
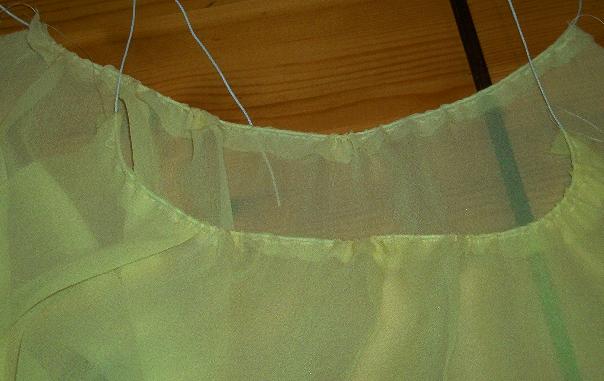
The piping pinned in. It was very easy to sew, actually. Sewing it in tightly made a nice casing, basically the same as for a drawstring.
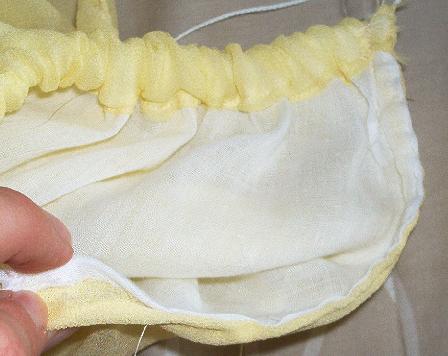
Before the sleeves were put on. When I put the sleeves on I left a little at the top unsewn so I could pull up the piping cord. I end up doing this on my dressform, MUCH easier than doing it on me. I pulled it a little too tight, but it was easy enough to let out. I'm very happy with the results...
The sleeve binding process. I was orignially going to bind the sleeves with bias tape, like I usually do, but read about German binding on the 18c Woman mailing list. You just fold the edges together and stitch together. It finished the seam nicely with no bulk.
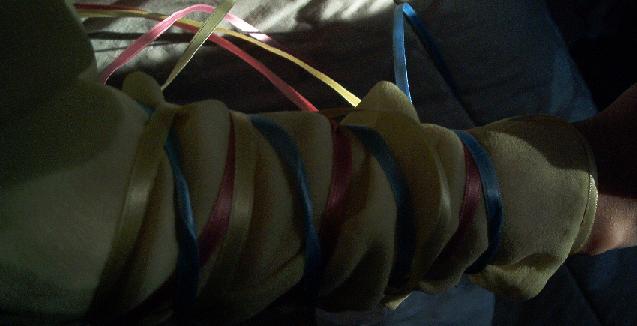
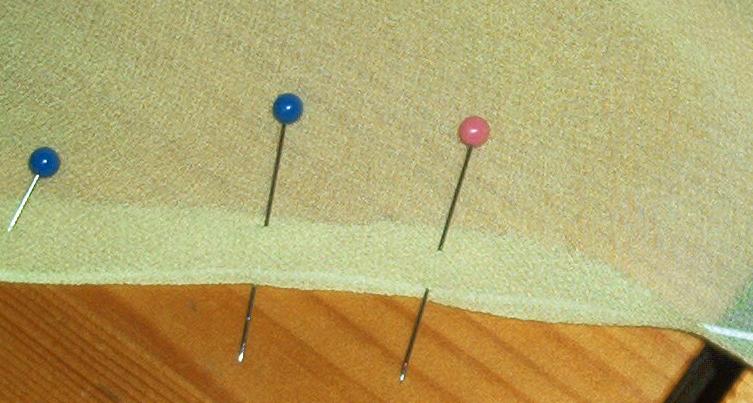
The ribbon pinned to and wrapped around the lower part of the sleeve. I decided against elasticizing the bottom, it seemed annoying and the ribbons seemed like they'd do the job. This way I wouldn't have to worry if the ribbon wasn't perfectly placed and let the elastic show either. I used Europa Imports ribbon from Joann. It's very soft and has a nice drape. The first ribbon I bought was quite stiff and too shiny. I was planning on using silk ribbon leftover from my Regency Ballgown, but I think Koshka knocked it into the garbage during one of his Daring Leaps from my bed to my desk. The ribbon is attached in three places. The pink is attached just under the elbow, the blue is attached at the wrist and the yellow is attached in the middle.
More to come!!!

 Home now please!