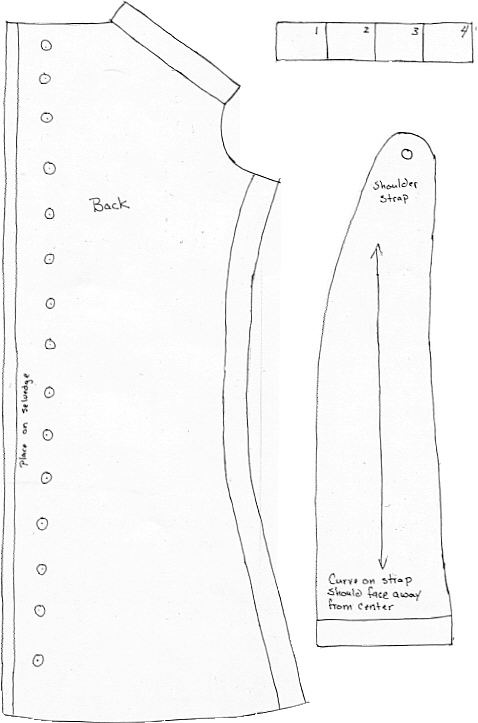
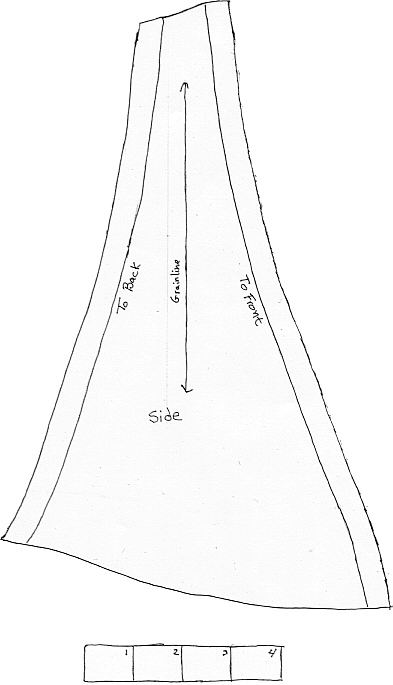

Click on each pattern piece for a printable 8 1/2" x 11" version
Please notice I forgot to use balance marks. I have a large note pinned to my work area now that says "Use Balance Marks!." I didn't feel comfortable putting them in after I had finished the pattern.
A note about the seam allowances. Every time I've scaled up a pattern I've wished the seam allowances were already there, since I like to make an exact size sample first. However, if you're doing any sizing it's likely that the seam allowances will grow or shrink with your sizing, so it's probably best to use the seam lines and then add your own seam allowances. Whatever works best for you!
The corset is made of 2 layers of fabric, the outside cotton twill, the inside what I think is a lightweight linen, though it may also be cotton. I used cotton twill for the outside of my corset, and muslin for the inside. The two layers are made up seperately, then put together, wrong sides together, then bound, so no seams show.
The approximate finished measurements of the corset are 24"-21"-27"
Making the Corset, The Period Way
Making the Corset, The Modern Way
The following directions are a slightly simplified, modern way to make the corset. With this method, you make both layers of the corset and put them wrong sides together. In the original when the outer layer was sewn together, the seam allowances were folded down before being sewn, making small ridges at each seam. The lining was then whipstitched to these ridges. I've since made a handsewn corset using the period method.
The method for the gussets, binding, busk pocket and back edges remains the same. Only the lining and cording are different. The original only uses cords on either side of the busk and the back edge. The seam technique described above makes a very firm seam.
First, get the gusssets out of the way.
Oh, please excuse the state of the ironing board. Our iron burps and we have extremely hard water (it even has rocket fuel in it!) so it really eats away at the cover :)
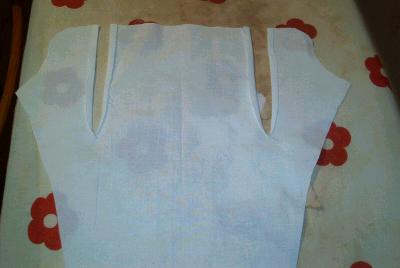
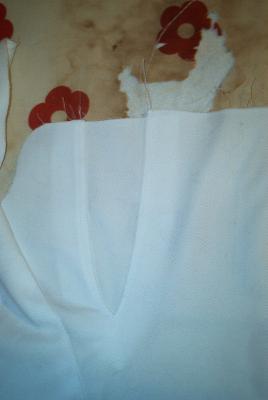
Cut slits for the gussets as indicated on the pattern. Fold back the cut edges 1/4" and press. Carefully press around the point, and it will fold in just slightly so no raw edge shows.
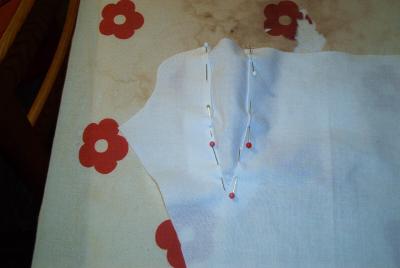
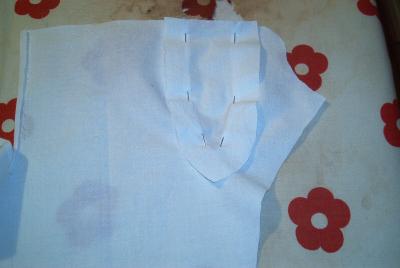
Next, pin the gusset in. Please note that the gussets have a 3/4" seam allowance. This means two things. One, the edges of the gusset are graded so that you don't have several layers of fabric on top of one another. Two, the gusset is easier to put in since the seam allowance is large and you don't have to worry about the gusset falling through the slit :)
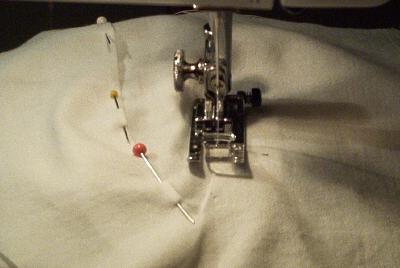
Next, sew the gusset in. Sew as closely to the folded edge as possible. When you get to the point, sink your needle in, pick up the presser foot and pivot the corset around so that the presser foot is pointing in the right direction, put the foot down and continue sewing to the end.

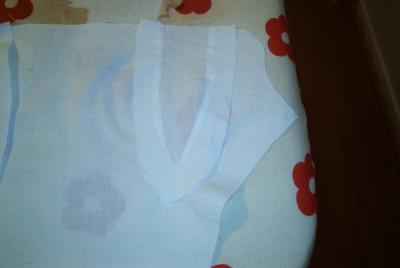
The completed gusset from both the right and wrong sides.
Not that it really matters, but this layer didn't end up in the final corset. I cut the middle section 1/2" too wide, so needed to go back and adjust the pattern. All that work on the gussets for nothing, though I suppose it was good practice :)
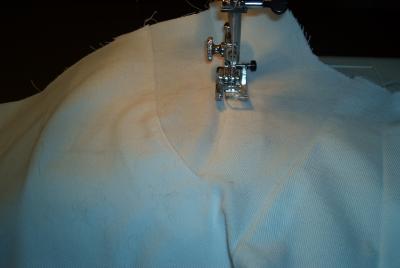
On the twill layer only, the gusset is topstitched 1/4" from the seamline.
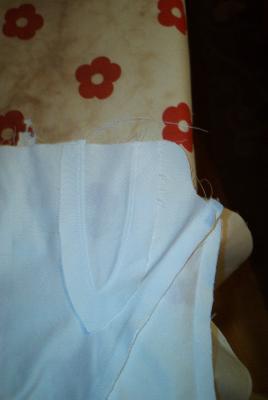
The twill gusset on both the right and wrong sides.
Next, sew the backs to the sides, the sides to the front and sew the straps to the back.
 Home now!